Tips for Installing Newel Posts
About the Project
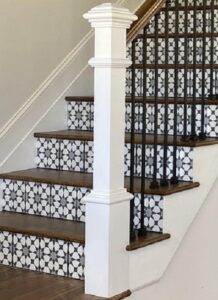
Building my own railing system in my new house was one of the most satisfying and nerve-racking projects so far…and I’ve done a lot. I say that because any failure can have devastating consequences, especially since the first-floor ceilings are 10’ (that’s a long fall in an open foyer).
The newel posts are like the cornerstone of the build and what gives the system its strength. A weak post will make nervous so let’s get it right.
Common Questions When Installing Newel Posts
It’s all about the strength, if you aren’t sure if it needs the extra strength do it anyway. You’ll never regret going overboard, but you will if you don’t do enough.
1. How do I anchor a newel post?
This depends on what type of post you have. I used one of the square edged posts found in the box store that was hollow in the middle with an anchor block on the inside that it slides overtop.
To start, FIND THE FRAMING STUD. Do not just screw this into the plywood thinking it’s going to be strong enough. Every person with a child swinging around the corner while holding on the post knows this will quickly fail. Find the stud and screw a long lag bolt (or similar) through the top of the anchor block into the framing stud below. I used a 12” bolt and some gorilla adhesive and drilled straight down into the floor.
The other newel post I had to secure to the step/riser itself. Similar to the other newel post I found a solid piece of wood to secure into (in this case the stair stringer board) and bolted the anchor block into that along with some glue.
Once these anchor blocks have been secured, slide the newel post over the block (having already cut angels and length as needed) and secure to the anchor block using heavy duty screws. You may wish to use glue between the anchor block and the post but if you ever need to fix or replace you may need to cut the whole post off instead of unscrewing it.
2. How much do I need to cut off my newel post?
This depends how far the post is from the riser. The angle of your railing will be same as the angle of steps so don’t even think about cheating the angle in order to line it up and get similar spacing on your newel post. Instead you’ll want to adjust the height of the post itself and/or move the post in or out. For example, if the top newel post is a couple inches away from the last step and the railing is 2” down from the top of that newel post, you may have to make adjust the height of the bottom post or distance from the last step in order to maintain the same angle AND have the bottom railing also be 2” away from the top.
The most important things are to maintain the angle of the railing and have the railing meet the newel post at the same spot on both posts. Make the necessary adjustments to do those two things.
Tips When Installing Newel Posts
1. How do I fill holes in the newel post?
Get some workable epoxy filler to fill holes where you screw through the post. This stuff dries rock solid, doesn’t shrink and blends nicely.
2. How do I paint a newel post?
It’s true what they say, use multiple thin coats instead of fewer heavy coats. I don’t always follow this advice but I finally did and it looks amazing. I used a lacquer based white spray paint and used a 400 grit sandpaper before the final coat and it looks like a professional job. Take your time and give it a chance to dry and do that last sanding.
3. How do I figure out where to cut a newel post?
Once you know how far down the newel post the railing will be attached, mark that point. Tip: mark the post where the top of the railing will be in contact with the post. So if the railing will be 2” down from the top point then mark that on both posts.
Then place a 2×4 cut to the correct angle and cut the height so that the total height (with thickness of the railing is 34-38”. Tip: to find that angle use two levels, one on the 2×4 to make sure it’s perfectly plumb straight up from a step and one going up the steps. Mark that angle on the board.
Place the 2x4s under the railing and steady in place with clamps or even a small screw into the bottom of the railing. Once you have your angle and height correct (double and triple check), mark the newel post where the top of the railing crosses it.
The difference between the 2 marks is how much will need to cut off the bottom. So if the first mark where you want the top of the railing to touch is 2” but the top of the railing crosses over at 5 1/2” then you would cut 3 1/2” off the bottom to lower the post.
Identify Tools Need to Install Newel Posts
Below are tools that are either critical to the job or that I would highly recommend to make your life easier. There’s nothing more frustrating than spending an extra 2 hours of time with inadequate tools just to save $40 by not buying what you need.
I am not the seller of these products, however, I have used these or similar tools in my projects.
Critical Tools
Recommended Tools
As an Amazon Associate I earn from qualifying purchases.