Tips for Making Wood Beams
About the Project
Adding wood beam accents to your home is a big trend right now. It makes your home feel a little more cozy and inviting, while also giving a custom and mature impression. There are many online that can cost you an arm and a leg and are generally not even wood but rather a poured mold of composite material. One of the complaints I’ve heard from these products is that they look fake. That’s not surprising consider they are.
What better way to make them not look like fake wood than to make them out of real wood. Brilliant! And at a fraction of the cost it seems like a no-brainer.
Common Questions When Making Wood Beams
While easy to build they can be a pain to get to an end state if you aren’t considering everything.
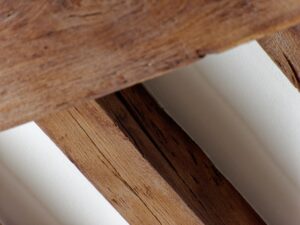
1. What does a faux beam look like?
Notice I didn’t say “faux wood”. This is indeed wood, just not solid wood. The beam will be a U-shape when it’s all done.
2. How do I secure a faux beam to the ceiling?
This is so simple you’ll say “that’s it?”. The wood you make the beam out of will likely be a 1×8 or 1×6 or whatever width you want it to be. You simply use that same width on a 2-by board. Secure the 2-by board to the ceiling and then slide the U-shaped beam over top and secure it to the 2-by board.
3. How do I secure the faux beam sides together?
This will obviously be the weak part of the structure so take care to make sure it doesn’t come apart. Put a light bead of glue down the entire length of the boards and clamp them tightly together. Once everything is as tight as possible put a nail in every 14” or so. Let it dry, let it dry, let it dry.
4. How do I rough up a beam?
Another way to ask this is: How do I make a beam look hand-hewn? The easiest way to do this is to use an electric planer and just starting gouging it. Hand-hewn beams are supposed to be far from perfect so don’t try to make it look perfectly and symmetrically imperfect because that defeats the purpose. Honestly you can use just about anything to rough it up. Use nails to poke holes in the surface to make it look like worms naturally burrowed into it; a wire brush to make some areas look rougher, etc. The thing I did that really took my beams over the top was using a grinder and make cuts into the surface. These vary in length, depth and width. Look a pictures of natural wood beams to get an idea of how they crack before jumping in. It’s hard to mess it up. Some of my favorite beams have the biggest cuts. One piece of advice is to always go longways on the beam to make the crack look natural. Don’t go sideways.
Tips When Making Wood Beams
1. When building the U-shaped beam length, make sure the board at the bottom of the U-shape is inside of the two sides. This is simply for purposes of securing to the board on the ceiling. If the board is 6” wide and the 2-by is 6” wide it’ll slide over like a glove. If you put the bottom board on top of the side pieces not only will you need a lot more clamps but the 6” wide board will be more narrowing by the thickness of both side
2. If you don’t have a 2-by board long enough you can cut it into lengths and spread it out along the length if needed. The board
doesn’t need to be behind the entire beam. It’s just for nailing.
3. Make sure the nails you use to secure the sides are deep. Remember, when you are planing the beam to distress it you are removing chunks of the surface. If the nails aren’t deep enough they will likely cause your planer blades to break. The blades aren’t super expensive but it can be a
pain to swap them out multiple times during the building because you keep hitting the nails. Oh, and get extra blades.
4. When you are gluing and nailing the U-shape together, put some blocks inside in the beam to keep the U-shape from pinching together and being 5” instead 6” where the opening is. Use blocks the side width as your 2-by…or better yet, use the 2-by itself. If the U-shape pinches or widens too much you may end up cracking the wood as you secure and squeeze it or as you widen it to fit.
5. You are going to need a lot of clamps. Start collecting or borrowing.
6. I found that the 2-by nailing board shows a tiny bit where the beam meets the ceiling. This isn’t because the beam is warped; it’s because the ceiling has some very fluctuations in heights. Unless you are going to really push on your beam to get them super tight before securing them, I’d recommend putting a little stain on edge before install the 2-by boards. That way it’ll be a little less obvious. That said, you don’t really notice the boards on my ceiling unless you are really looking for it.
7. Don’t use any kind of gloss coating…even a satin finish. I wanted to protect the wood and thought a satin finish would have a great result but I think the sheen makes the beam appear fake. I would opt for flat or just unfinished (stain only).
8. When installing the beam, bumping the wall can result in scuff or stain marks on the wall. Put a piece of painters tape on the ends to prevent the scuffing.
Identify Tools Needed to Make Wood Beams
Below are tools that are either critical to the job or that I would highly recommend to make your life easier. There’s nothing more frustrating than spending an extra 2 hours of time with inadequate tools just to save $40 by not buying what you need.
I am not the seller of these products, however, I have used these or similar tools in my projects.
Critical Tools
Recommended Tools
As an Amazon Associate I earn from qualifying purchases.