Tips for Tiling a Backsplash
About the Project
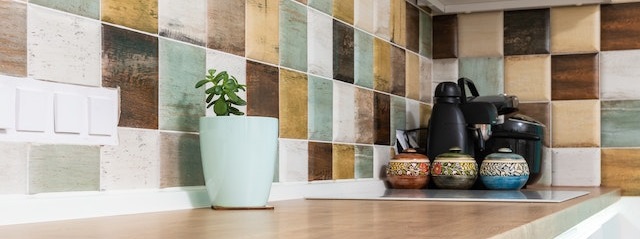
A backsplash can really make a space “pop” and provide a custom look to any space, whether it’s a kitchen, wet bar, laundry room or mudroom. You can really express yourself and go bold if you’d like. The good news is, in my opinion, the process of picking out the tile is hard part.
Common Questions When Tiling a Backsplash
1. Should I pick a trendy tile?
The first common mistake when choosing tile is to pick something that is too trendy. Trends can last for many years, but they could also last for just a year or two. Following a trend can result in your house looking outdated in just a few years and you may be looking to remodel again. I always tend to lean toward the style most consider “timeless”, such as a subway tile. The nice thing about subway tile is that it can be installed in a variety of patterns to dress it up without losing the simple charm.
2. What style of tile should I get?
Another mistake is to make a selection that doesn’t match the style of your house. I’m not an interior designer so I won’t delve deep into this but choosing an Arabesque tile pattern in a Victorian style home would likely seem out of place. Do your research and look at tons of photos to determine what you like.
3. Are all tile created equal?
Lastly, don’t settle for something cheaper. I’m not saying everything more expensive is better; I’m saying don’t give up what you want or like in order to save $300. Backsplashes are very little square footage and material cost is generally minimal. So, while a 12×12 mosaic may cost $15 per square foot and the subway tile might be $2 per square foot, over a countertop that’s 15 feet long that’s $50 vs $337. The kitchen should be one of your biggest investments, not where you look to save money.
Tips While Tiling a Backsplash
Starting the project can be daunting and can find yourself asking “How do I start tiling a backsplash?” There’s not always a clear answer to this. Let’s look at some question and factors to consider when installing a backsplash. Before continuing below, I have to remind you that it’s okay to draw on your wall while you’re planning. It’s all going to be covered. Heck, you can write stupid messages on the wall to the next Joe who rips the wall off.
1. Is there a focal point on the wall?
I’ve seen backsplashes that have a picture frame accent on the wall centered over a stove, sink or window. Get these areas drawn on the wall before you get started. The last thing you want is to have odd size cuts on both sides…although you may not have a choice depending on other factors.
2. How big are the cuts going to be?
What tile cut is too small? You’d like for the cuts to be as big as possible, but it really all depends on the size the tile. The smallest tile cut I’d like to see is a quarter the size of the whole piece. So, if the tile is 4” I wouldn’t want something smaller than 1”. Not only does it look like you didn’t plan well but it also makes it more difficult to cut. There are times where you can’t help this because of outlets or window jambs, but the bigger the better.
To figure this out, do a quick dry set. This is basically laying the tiles out (or leaning them against the wall) to get a general idea of where the cuts will be and how big. If you find multiple small cuts then you can try shifting everything half the distance of the tile so that you are essentially starting with a half tile. There will be some playing around at this point to get it within reason.
3. Where should I end a backsplash?
If you have a wall or cabinet on both ends then you’re life got easier…congratulations. If not, you have a couple options. You can end at the edge of the last cabinet, the end of the countertop, or even some of fixture that may be there. The key is to not make it look so abrupt or awkward. If possible, to try to end so that only one edge of the tile needs an finished piece (bullnose, rounded chair rail, etc.). Once you think you know where it will end, make sure you factor in whatever finished piece your using (because no one wants the end of a tile just caulked or grouted to hide the end), run a dry set (noted above) to double check everything.
4. Where should I start a backsplash?
The age old question here that gets asked all the time and I saved it until last for a reason. This is really a combination of the preceding points. However, it really all comes down to the size of your cuts. If you have a tile cut that is too small, move everything and try again.
If you are going wall to wall or wall to cabinet, or whatever, then find your center of the wall and run a dry set start at the center point to see how big the cuts are at the end. If the cuts are smaller than half the tile then shift everything. Do this by marking the center of one of the sides of the tile and run a dry set by starting that mark on the center mark on the wall.
If the wall you are tiling is open at the end and doesn’t have a cabinet or adjacent wall, then reference #3 above and determine the ending point that would be most natural or less awkward. If you decide to end where the counter ends, then start your dry set there and work toward the corner. If the corner is a reasonable size then you should be good to go.
5. How level is the countertop?
Running a backsplash on countertop that isn’t level can be a major headache. The headache comes when you realize that every tile along the bottom needs to be cut or you have big gaps.
When planning out the install you aren’t only considering where to start going horizontally but also vertically. That means you need a level line. DO NOT RELY ON THE COUNTERTOP TO BE YOUR LEVEL LINE. Most countertops are generally pretty level but nothing is perfect. Here are the scenarios:
– You start at the highest point and the countertop drops significantly then you might have a big gap that you need to caulk
– You start at the lowest point and realize after a couple columns that all the bottom tiles will need to be cut down to fit.
– You use the countertop as your level (even though it isn’t) and you end up with wavy grout lines.
Find a spot on the counter and measure 3” up the wall. Use the level to mark a level line all the way around, then use your tape measure and measure the distance from the countertop to the level line every foot or two to see how it fluctuates. An 1/8” difference would be acceptable to me to caulk. If so, find the point where your measurement was the smallest (highest point) and run a level line using the height of the tile you’re using. If the difference is closer to 1/4” then I would split the difference and lower the level line 1/8” so that only half the tiles need cut and caulk other areas.
Remember not to spread too much cement or glue on the wall at one time. There’s nothing more frustrating than scraping the wall of adhesive. The same this is true when you are grout…actually maybe there’s nothing more frustrating than scraping dried grout because you spread too much.
When you’re done everything remember the wall is now thicker and there is a chance the outlets don’t screw into the box anymore. You’ll need longer screws and readily available at the hardware store. If the tile isn’t close enough to the outlet ears and it doesn’t have anything to hold on to, don’t panic there are piece you can add to the outlet to provide the support needed. Don’t just put a floating outlet into the wall…you’ll be asking for trouble.
Last thing I wanted to mention is that if you were ever thinking about putting under cabinet lights in now is the time. It’s easy enough to cut the drywall, run the wiring, and hide behind the tile.
Identify Tools Needed to Tile a Backsplash
So, what tools are needed to tile a backsplash? I’ve tiled a backsplash with only 2 tools before (dry track cutter and snips). It’s not ideal but I’ve had lots of experience and can work some miracles with basic snips. I wouldn’t recommend it so I wouldn’t suggest it.
Below are tools that are either critical to the job or that I would highly recommend to make your life easier. There’s nothing more frustrating than spending an extra 2 hours of time with inadequate tools just to save $40 by not buying what you need.
I am not the seller of these products, however, I have used these or similar tools in my projects.