Tips for Tiling a Shower
About the Project
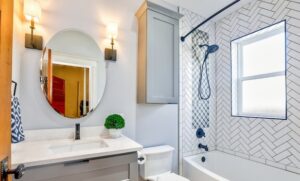
So, you want to make your shower feel like spa? Maybe you want to keep it simple and replace the shower walls around the tub. It’s not terribly difficult and you can really give your bathroom a whole new feel with a simple update.
Common Questions When Tiling a Shower
1. Should kind of tile should I pick?
As noted in other articles, the first common mistake when choosing tile is to pick something that is too trendy. Trends can last for many years but they could also last for just a year or two. Following a trend can result in your house looking outdated in just a few years and you may be looking to remodel again. Are you going to be happy with the glass mosaic, the black tile, or accent stripe around the top? I always say, keep it simple and dress it up with replaceable accents (like towels, benches, plants, paint, etc.)
2. What style of tile should I pick?
Another mistake is to make a selection that doesn’t match the style of your house. I’m not an interior designer so I won’t delve deep into this but choosing an Arabesque tile pattern in a Victorian style home would likely seem out of place. Do your research and look at tons of photos to determine what you like.
3. How much do I need to waterproof a shower?
The biggest mistake when redoing a shower is not waterproofing enough. My first precaution is to install the bottom (floor or tub) first and then overlap the wall panels and tile over the bottom lip to make it further difficult for water intrusion to run horizontal and then up and over the lip. Additionally, I will cut the panels tight, overlap them and caulk the corners tight.
There are several products that allow for waterproofing and many videos on you tube to show you how so I won’t cover that, but that’ll go on before the tile. Then the wall tiles will be installed overlapping similar the panels. The corners will then have a stepping pattern; meaning backwall panel, then side wall, then backwall tile, and then side wall tile, which makes it further difficult for water to intrude.
Tips While Tiling a Shower
Start the project can be daunting and find yourself asking “How do I start tiling a shower?” Let’s look at some question and factors to consider when installing shower tile.
1. Is there a focal point on the wall?
I’ve seen showers that have a picture frame accents centered on the back wall. Get these areas drawn on the wall before you get started. The last thing you want is to have odd size cuts on both sides.
2. How big are the cuts going to be?
What tile cut is too small? Generally speaking you’d like for the cuts to be as big as possible, but it really all depends on the size the tile. Not only does a tiny look like you didn’t plan well but it also makes it more difficult to cut. To figure this out, do a quick dry set. This is basically laying the tiles out (or leaning them against the wall) to get a general idea of where the cuts will be and how big. If you find multiple small cuts then you can try shifting everything half the distance of the tile so that you are essentially starting with a half tile. There will be some playing around at this point to get it within reason.
3. How high should I bring the shower wall tile?
I’ve done all different types of showers and it really all comes down to preference. I prefer to bring it up a little high than usual (maybe a foot higher) for two reasons:
– The water in the shower splashes up onto the wall above the tile and it will be more likely to develop mold.
– I like to have the shower head come out through the tile, which also helps to ensure the escutcheon plate rests flat.
The key is not make it look so abrupt or awkward. If possible to try to end so that only one edge of the tile needs an finished piece (bullnose, rounded chair rail, etc.). Once you think you know where it will end, make sure you factor in whatever finished piece your using (because no one wants the end of a tile just caulked or grouted to hide the end), run a dry set (noted above) to double check everything.
4. Where should I start the tile in the shower?
The question that gets asked all the time. Showers are generally started on the center line of the wall. Find your center of the wall and run a dry set start at the center point to see how big the cuts are at the end. If the cuts are smaller than half the tile then shift everything. Do this by marking the center of one of the sides of the tile and run a dry set by starting that mark on the center mark on the wall. You should end up with at least a half tile.
5. How level is the tub or shower floor?
– You start at the highest point and the countertop drops significantly then you might have a big gap that you need to caulk
– You use the countertop as your level (even though it isn’t) and you end up with wavy grout lines.
Find a spot on the tub or shower pan and place a mark the height of the tile, then use a level to mark a level line all the way around. Using your tile, place the tile against the wall and mark whether it overlaps the lines (high spot) or comes short (low spot). At the lowest spot that was marked (which is usually the side where the drain is) draw a level line around. This is the line where top of the bottom tile will be. The easiest way to start is by nailing a start strip onto the wall so that the tile can rest on it. Depending on the size the tile and the cement, the tile will begin to sag if there’s nothing to support it. If the tile requires a grout joint you will need to add a spacer on top of the board.6. How do I install a soap dish?
Think about your needs in the shower. Do you need 6 soap dishes because your spouse has 4 bottles of shampoo, 3 bottles of conditioner, foot scrub, and a razor, or because you need a place to put your beer? Then figure out where to put them. If you aren’t sure if you need one…then you need one.
The corner dishes are easy to install and just rest on top of the tile below. Put the full tiles around and then mark the cuts as necessary.
As always, remember not to spread too much cement or glue on the wall at one time. There’s nothing more frustrating than scraping the wall of adhesive. The same this is true when you are grout…actually maybe there’s nothing more frustrating than scraping dried grout because you spread too much.
Success is all about preparation. Watch a ridiculous amount of videos and give it a try. The worst thing that happens is you have to pay someone to do what you would’ve had to pay for to begin with.
See how these tips compare to tiling a backsplash or floor.
Identify Tools Needed to Tile a Shower
So, what tools are needed to tile a shower? I’ve tiled a shower with only 2 cutters before (dry track cutter and snips). It’s not ideal but I’ve had lots of experience and can work some miracles with basic snips. I wouldn’t recommend it so I wouldn’t suggest it. Below are tools that are either critical to the job or that I would highly recommend to make your life easier. There’s nothing more frustrating than spending an extra 2 hours of time with inadequate tools just to save $40 by not buying what you need.
I am not the seller of these products, however, I have used these or similar tools in my projects.Critical Tools
Recommended Tools
As an Amazon Associate I earn from qualifying purchases.